How to Prepare and Install Your ClickTight Convertible Car Seat
Preparing Your Seat for Use
Before installing your ClickTight convertible car seat, adjust the harness and buckle to fit your child by following these simple steps:
Step 1: Adjust the harness to fit your child properly
Our ClickTight convertible car seats include an innovative harness system that allows you to adjust the harness positioning in two places - at the child’s hip and shoulder levels – to provide a custom fit for your child.
If You Own a ClickTight Convertible Seat
During the initial production of our ClickTight convertible car seats, a small percentage of the car seats were assembled without properly attaching the lower harness straps. Please read these instructions to make sure your care seat's lower harness strap is correctly and securely attached.
Adjust the Harness at the Hip
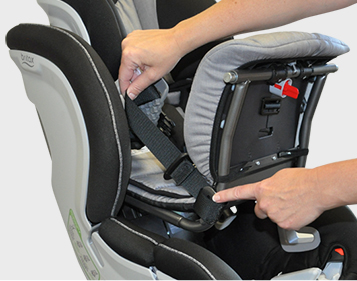 Harness Hip Adjustment - Standard Position
Ensure that the harness is properly adjusted and secured in the standard position at the hip anchor.
CLICK HERE TO SEE INSTRUCTIONS
Harness Hip Adjustment - For Extra Room
If your child needs more room to fit comfortably within the harness AND is 2+ years old, the harness can be adjusted to a longer length. This is ONLY an option for children 2+ years old.
CLICK HERE TO SEE INSTRUCTIONS
Adjust the Harness at the Shoulder
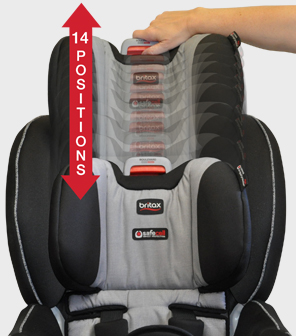 Harness Shoulder Adjustment
Sit your child in the seat and move the harness to the appropriate harness height using the harness height adjustment lever.
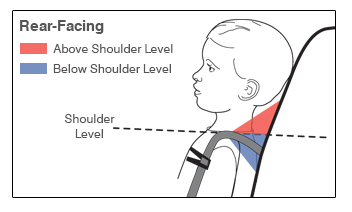 Rear-Facing
For Rear-Facing, the shoulder harness straps should enter the car seat shell at or slightly below your child's shoulders.
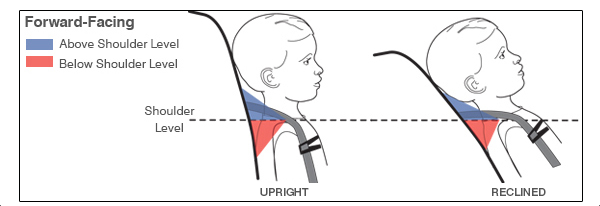 Forward-Facing
For Forward-Facing, the shoulder harness straps should enter the seat shell at or slightly above your child's shoulders.
LEARN MORE ABOUT HARNESS SHOULDER ADJUSTMENT
Step 2: Adjust the buckle to fit your child
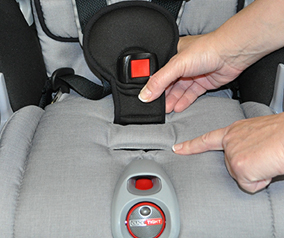
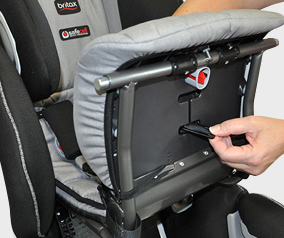
- While your child is sitting in the seat, check to see where the buckle strap is located.
- If your child will be rear-facing, the buckle can be in either buckle slot position at or closest to your child.
- If your child will be forward-facing, the buckle must be in the forward buckle position.
See How to Adjust the Buckle Position
Step 3: Installing your ClickTight convertible car seat
Once you have made the proper adjustments to your seat, you’re ready to install your new ClickTight convertible car seat.
Open the ClickTight Panel
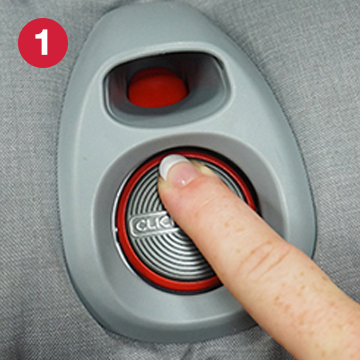
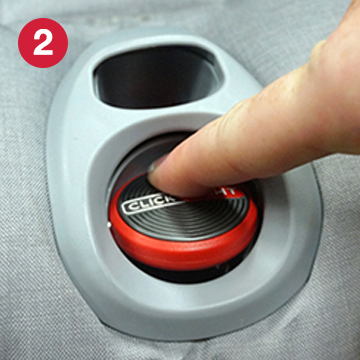
1. Identify the ClickTight Key. Find the indention.
2. Place your finger on the indention and push forward.
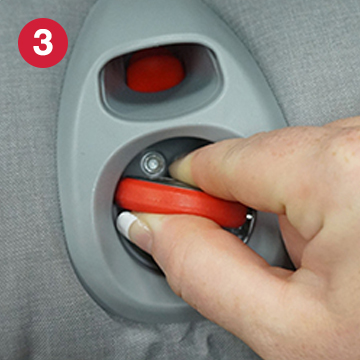
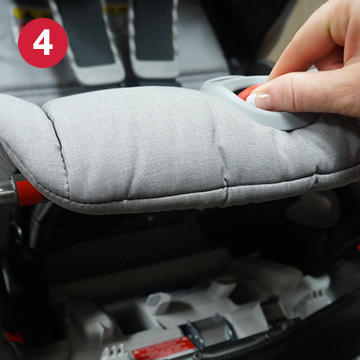
3. Hold the ClickTight Key with both fingers and rotate clockwise to unlock.
4. Lift the front panel of the seat to reveal the belt path.
Any doubts? Watch our video below.
Rear-Facing Installation using the ClickTight Installation System
We recommend that children travel rear-facing for as long as possible – ideally until they are at least 2 years old and their developing neck muscles have grown stronger.
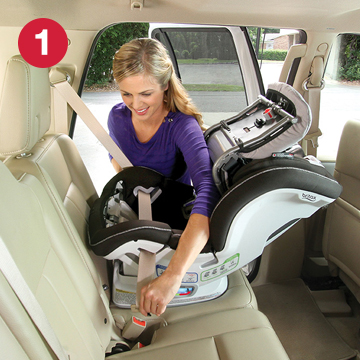
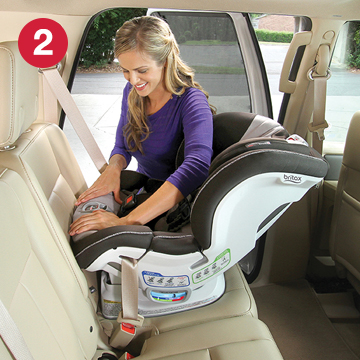
1. Place the vehicle seat belt into the rear-facing belt path slots and buckle.
2. Close the seat and the “click” tells you that you have a secure installation.
Forward-Facing Installation using the ClickTight Installation System
When your child reaches the maximum height and weight capacity for rear-facing installation, the seat should be switched to a forward-facing installation, as shown below.
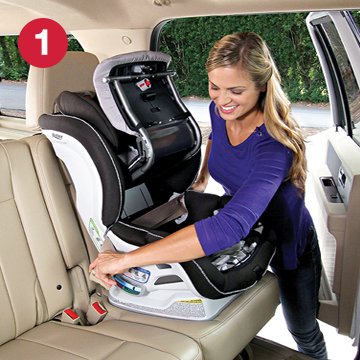
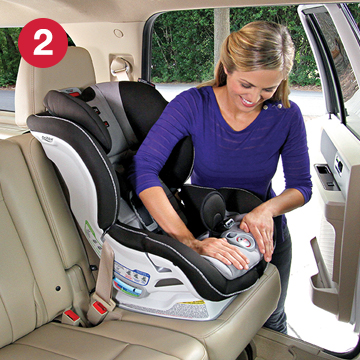
1. Place the vehicle seat belt into the forward-facing belt path slots and buckle.
2. Close the seat and the “click” tells you that you have a secure installation.
Installation Videos
For your convenience, we also offer videos with step-by-step instructions showing how to install your car seat using either the ClickTight Installation System or the LATCH System.
Marathon ClickTight Installation Instructions
Boulevard ClickTight Installation Instructions
Advocate ClickTight Installation Instructions
Tightening the Harness
When buckling up your child, be sure the harness is snug enough by performing the simple Pinch Test.
NOTE: It’s important to carefully read both the user guide and the vehicle owner’s manual prior to installation.

